

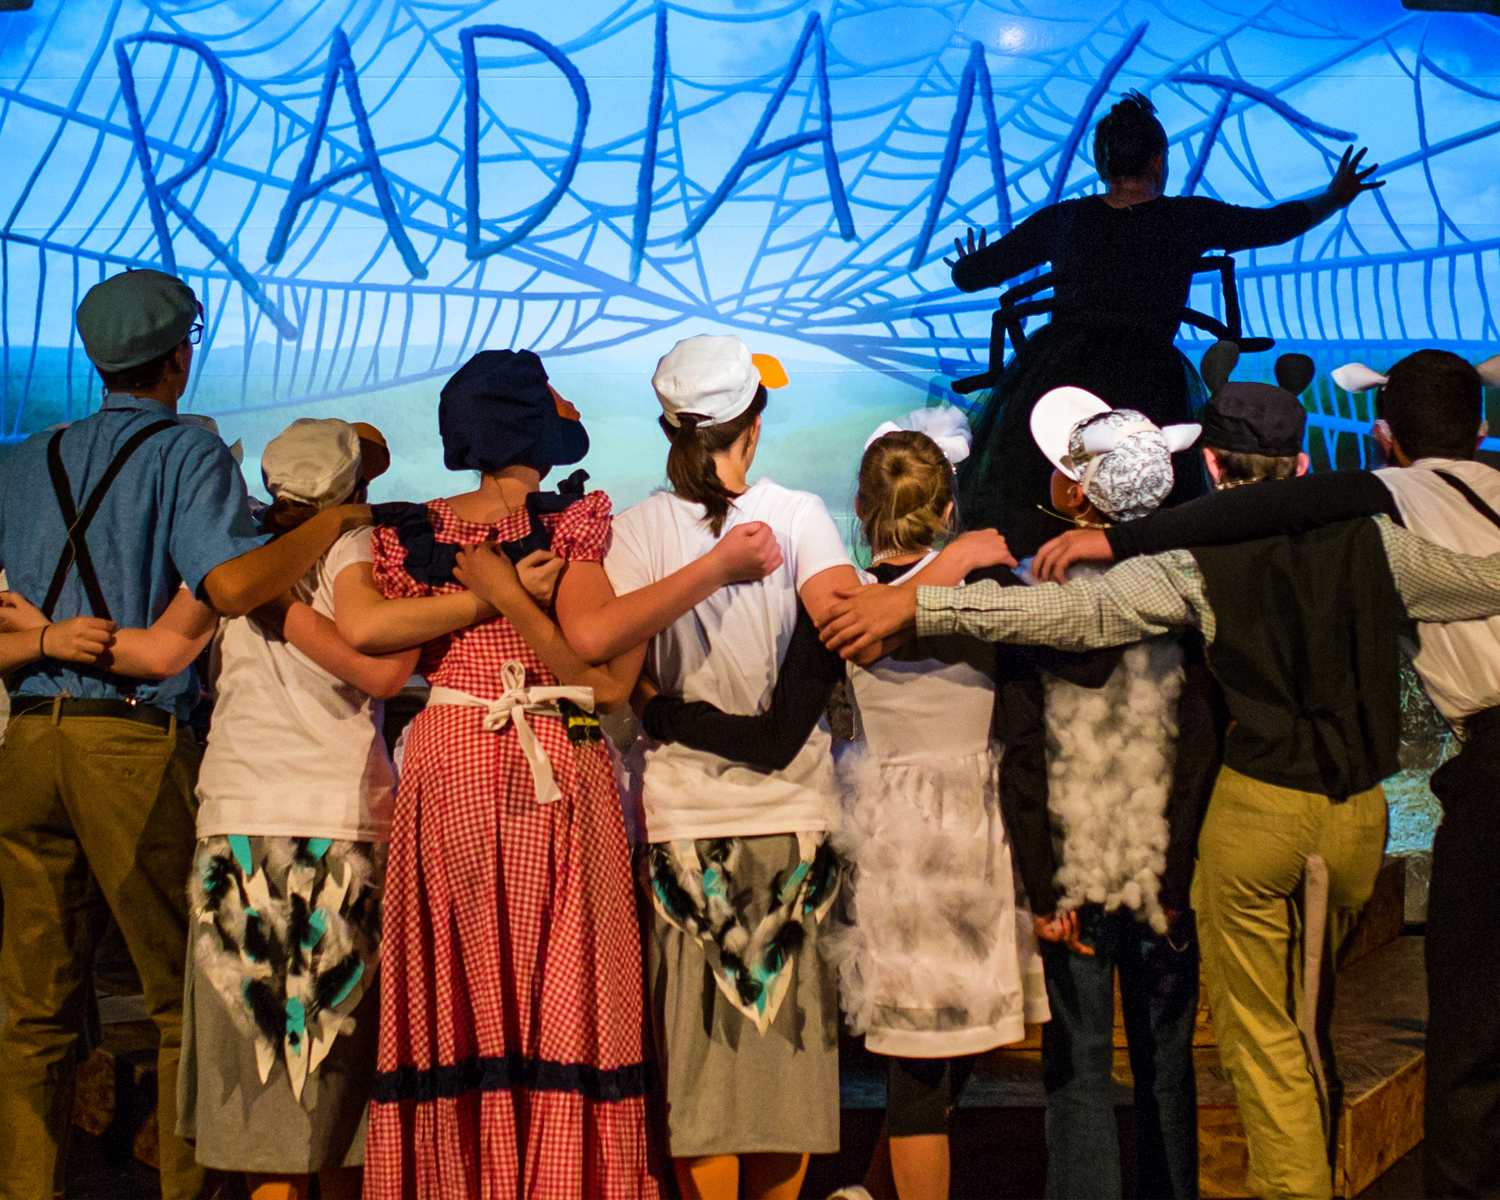
When combined with your other design elements (actors, lighting, costumes, set, props, etc.), projections can expand your ability to tell your story, even if you don’t have state-of-the- art equipment in your booth.
Using Vision, Passion, and Creativity to Compose Striking Images
Take photography as an example: you can own the most basic and inexpensive Polaroid camera, but with the right vision, passion, and creativity you can compose beautiful, striking images. We also know that even with the most expensive camera equipment, it’s possible to shoot mediocre pictures.
Your vision is what matters most, and your commitment to bringing it to life on stage. That being said, there are certain requirements to make projections work well in your space, but the best way to discover these is to get in there and try it. Be creative! Get your hands on the best projector, screen and laptop you can, set it up in your theater, and play.
Tweak projector settings, try different images, adjust your theater lighting. You can research online all day and take other directors’ advice, but there is no substitute for seeing projections in your own space and making adjustments based on what you see.
Don’t be afraid to delegate to a student, volunteer or tech to try it out for you. You will keep learning and discovering ways to make it look better for the next show; but you have to start somewhere.
Finding a Projector Screen
Screens are everywhere. Anything can be a screen. Anything. Generally, you want it to be light-colored (like a white, cream or very light gray) and reflective. But you can use everything from walls to ceilings to curtains to bedsheets to professional-grade material from Rosebrand.
There are multiple opportunities and options, from low-budget to high-end:
- A blank wall
- Sewn-together sheets
- Sewn-together shower curtains (for rear-projection)
- A surface painted with Screen Goo (a special paint that makes any surface a projection surface)
- Your existing cyclorama
- Fabrics like muslin from Rosebrand, Roscoe, or Gerriets
- Material specific to projection from the same companies
Hang the material or stretch it around a frame. Some groups have even built their own frames out of wood or PVC piping. There are a lot of decent DIY (Do It Yourself ) videos on YouTube that can help.
Choosing a Projector
The truth is, many projector types will get the job done. What do you need to make it work? If you are purchasing a new projector, there are lots of specs to consider, and so many levels of pricing, it’s like buying a car.
However, when you get right down to it, all you really need is a projector of basic-to-good quality. You can always level-up later, as your productions’ value (and budget) grows and your tastes become more refined.
Brightness is Key
The most important thing with projectors is BRIGHTNESS. Brightness is key. Buy, rent, or borrow the brightest projector you can. This will help the image show up in the presence of ambient and stage lighting in your theater.
Technically speaking, projector brightness is measured in ‘lumens.’ If you’re in a small space, and you can control your lighting, you can get away with 2,500 to 3,500 lumens in your projector. For mid-sized to large spaces like a high school or auditorium, you’ll need a minimum of 5,000 lumens. Our motto is always “the brighter the better.”
When it comes to other technical specs, just use common sense, or ask someone technical you know. There are customer reviews to look at, and also a lot of other schools, universities, and theatre companies that can offer up ideas and advice from their own experience.
Here are a couple of projectors that come highly recommended in a lower price range. (If you want to go all in and purchase any 10,000+ lumen options, you’ll want to consult a projection professional first.)
For Smaller Spaces:
- Optoma GT1080 (Short-throw projector) – 2,800 Lumens
For Mid-Sized Spaces:
- Optoma X600 XGA – 6,000 Lumens
- Panasonic PT-VX600U XGA – 5,500 Lumens Keeping the Projection from Washing Out Your best bet is to keep ambient light and stage lighting from pointing directly at your screen.
Focus your lamps about 5 ft off the screen if possible. You can do this by adjusting them down or using the barn doors to control the light spread. You can try using light trees in the wings as well, as an alternative to overhead lamps. Or use any combination of these things-whatever works best in your space to give you the brightest picture.
And don’t forget, a bright projector is key! Even traditionally painted backdrops start to wash out if they are saturated with too much light, so don’t worry about it too much. Just try to balance the amount of light and the direction of your stage lighting.
Keeping Performers’ Shadows Off The Screen
Keep your projector up high and tilt it down toward the screen-the closer to the screen the better. You can mount your projector from a light bar, or house ceiling in some cases. You’ll need to use your projector’s ‘keystone’ setting to correct the image in this case.
Also, consider a short-throw projector or lens. It cuts down the distance that the projector has to be from your screen, while still displaying a large backdrop image. If you have room backstage, try rear-projection, which means placing the projector at the back of the stage and projecting forward on your cyc or screen. Your screen will have to be a little transparent for this to work, like a normal cyc, but not so much that you see the projector light through it.
How to Project Your Chosen Images
Put your images into a slideshow software like Powerpoint or Keynote on a laptop. (QLab is a professional option if you want to level up.) Connect the laptop to the projector. If you use a long cable, you can keep your laptop up in the tech booth so that the student or technician running it can collaborate with the lighting and sound technicians.
You may want to put black slides in between your images for blackouts or even use the software’s built-in fades for smooth transitions between scenes. You can also drag animated movies or videos into Powerpoint or Keynote as a part of your presentation.