


Soundproofing for Music Rooms
The issue of noise transfer bleeding through common wall or common floor/ceiling surfaces comes first. The goal with the soundproofing efforts here is to line the perimeter surfaces with a combination of density and disconnection to force the collapse of the transmitting sound waves.
When done correctly, up to 90% of the bleeding noise can be mitigated. Mass loaded vinyl layered behind drywall with a channel system generating separation will force the collapse of the sound wave. If your starting point is a finished room, simply staple the mass loaded vinyl to the wall or ceiling, then run a resilient channel system over it, and a new layer of drywall to complete the layering treatment. Protect both the interior of the room from outside noise, as well as keeping neighbors protected from the music inside the room.
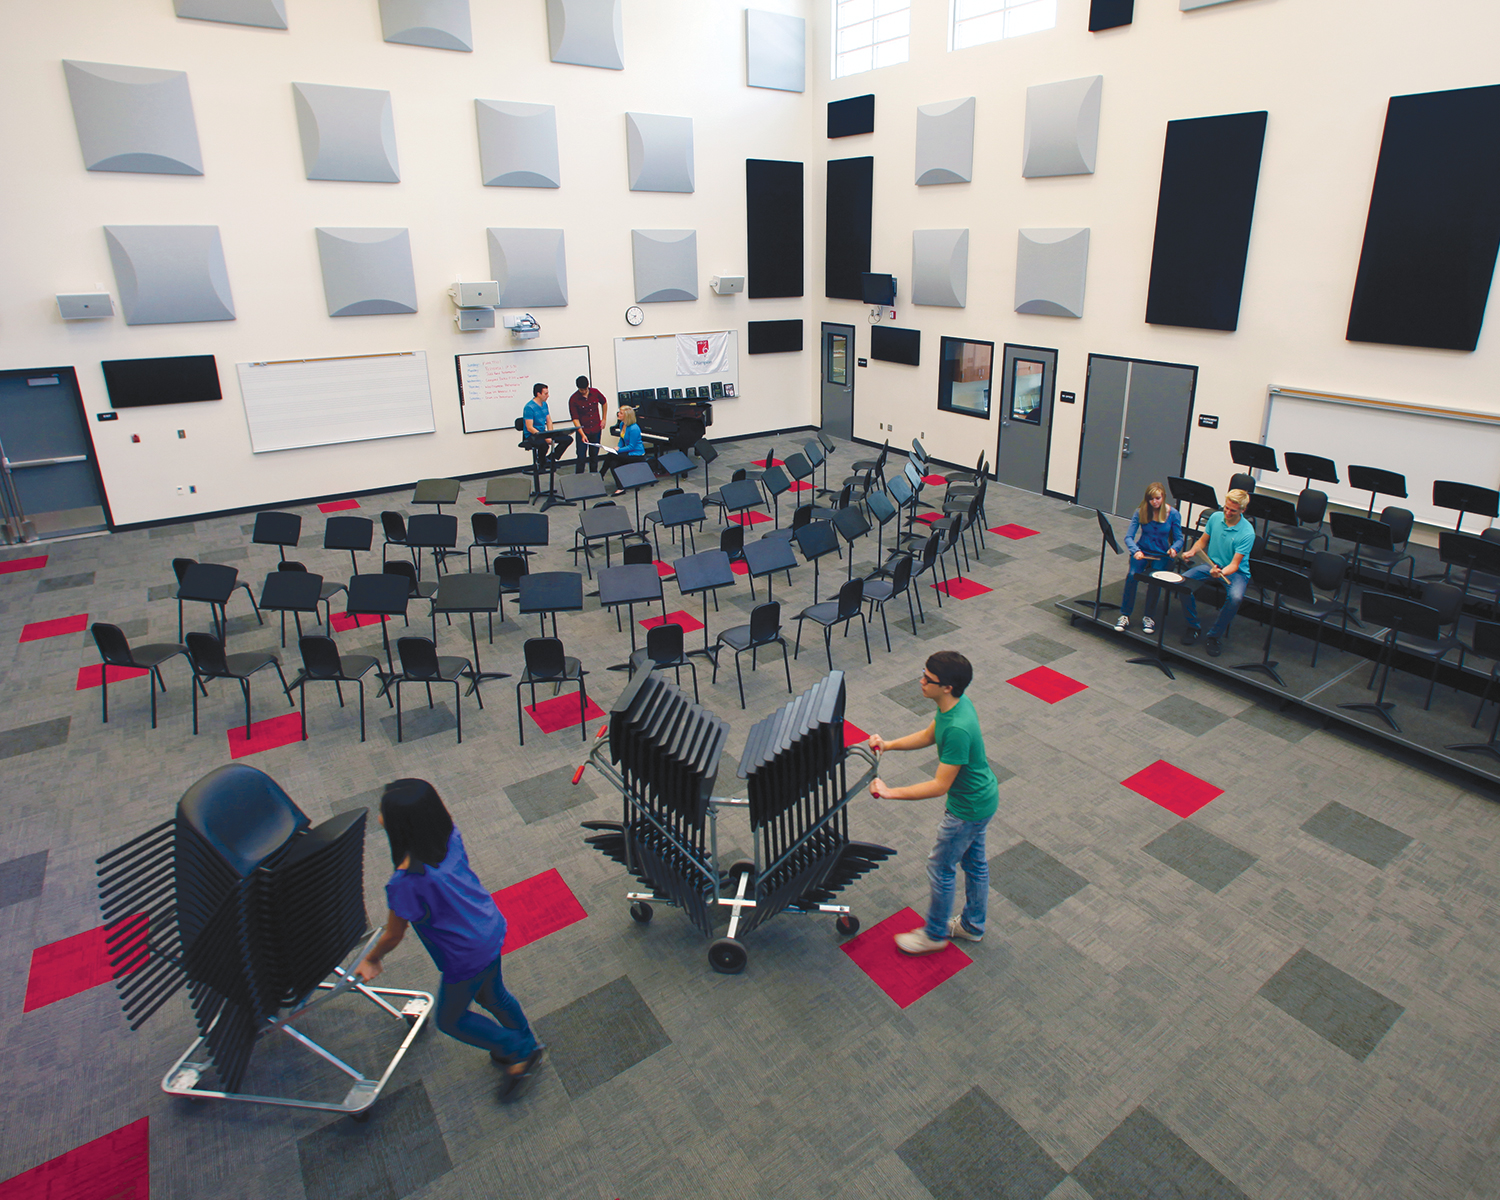
Sound Panels: Capturing and Converting Echoes
What does not work for sound protection are sound panels. Sound panels in a music studio or recording studio are there for the second purpose in your quest to build the ideal acoustic music studio environment. Sound panels capture and convert echoes out of the room, but do not block noise from escaping the room. Do not buy sound panels for your perimeter wall or ceiling surfaces thinking you are protecting others from your noise.
Instead, put the sound panels up to curb your echoes, lower the background noise, generate greater clarity to original sound, and then enjoy what your room’s intended purpose was built for: maximum sound quality.
Whether recording, rehearsing, performing, or broadcasting, the right combination of sound panels in your room will deliver the acoustic values you are seeking so long as the right amount of material is introduced into your music room.
Remember, sound panels for a music room are there to improve sound quality within the room. Be sure to opt for the thicker panel option when dealing with your sound panel supplier. Thicker sound panels generate greater performance values in the low bass frequency end of the spectrum, where drums and bass guitars roam.
Installing & Mounting Acoustic Panels on Different Surfaces
Sound panel treatments generate a more functional and user-friendly space by lowering background noise and generating greater clarity to original sound. A family of wall or ceiling mounted acoustic panels-placed in nice, even site lines evenly spread throughout a room- will effectively capture unwelcome echoes in a space and deliver premium sound quality.
The vast majority of commercial soundproofing applications will use a set of cloth-wrapped compressed fiberglass boards that will ship to the job site with a corresponding set of mounting clips. These installation clips come in a variety of options dependent on the surface the panels are to be applied to.
Acoustic Panels on Concrete & Brick Surfaces
For concrete and brick walls, metal clip systems are shipped with your order and anchored to the backsides of the sound panels, with a mating wall bar to be anchored mechanically to the surface. The treatment requires precision on pilot holes, but it is the only option for brick and block wall surfaces.
Acoustic Panels on Drywall Surfaces
For drywall surfaces, the treatment gets easier. Anchoring sound panels to drywall surfaces typically involves a clip system that ships with your sound panel order. Depending on the type of clips you choose, they may be easily screwed into the backside of each panel, which in turn is pressed to the drywall surface to “mark” where the mating portion of the clip is to anchor to the drywall. At that point, the panel simply surface mounts flush to the drywall surface.
Hanging Panels from a Ceiling
Some people opt to “float” their sound panels like a cloud. These cloud mount options are popular for ceilings that have pipes and obstructions on the ceiling, preventing a flush mount direct to the surface. Cloud mount options allow the sound panels to decoratively “float” out over the room in nice, even site lines. The panels can be suspended as high or low as you like, with attention being paid to lighting, sprinkler heads, ventilation, and other obstructions. Clips will be epoxied to the backside of your sound panels prior to shipment. Simply thread your own wire through the clips and free hang them from your ceiling or the tops of the bar joists.
Easy Adhesive Mounting
For those opting for the easiest installation method, and who have no need for portability of their panels, construction adhesive can be used in conjunction with a set of impaling clips, which have teeth. Simply screw them into the wall with the teeth facing outwards, apply adhesive to the backside of the panel, and press the panel into place. The teeth of the clips will penetrate the backside of the panel while the adhesive dries.
Mounting Acoustic Foam
For those clients who opt for acoustic foam, the installation involves nothing more than silicone adhesive being applied to the back of the panel and then placing the panel against the surface.
Consult with a Sound Expert
Regardless of your installation technique, the key to remember for triggering the intended sound values is to ensure that you are not under treating your space. Care must be given to analyzing the room based on its dimensions. Work with a sound consultant to ensure the correct product and mounting method is selected and also that the right amount of product is shipped to your project site. Once those details are all aligned correctly, you have the freedom to spread the sound panel treatment out within your room as you wish.